A Crafting Project to Boost Engagement in History
Having middle or high school students do historical research and show their learning on a 3D representation can spark deep interest.
Your content has been saved!
Go to My Saved Content.As a high school history teacher, I often had difficulty getting my students immersed in and excited about our topics of study, but over time I developed a hands-on activity in which students created a learning product that they could keep and display. This was a simple yet powerful learning tool that my students loved working on.
Lecturing was not working well for me or my students—they needed to be more engaged in their learning. One day, as I was looking at the state social studies standards for World War II and wondering what I could do differently. I noticed that there were 12 topics or ideas listed. My first thought was to have my students make a hanging mobile using a hanger, yarn, and note cards, but when I had tried this before students just threw them in the trash as they left the room—they liked doing something different but didn’t care for mobiles. Then I thought of trying a 3D geometric display to capture each of the 12 topics in the standards.

A dodecahedron has 12 sides, so I had my students cut out and build dodecahedrons. If you’re doing a short unit or if 12 topics aren’t needed, you can do this with pyramids or cubes using triangles or squares. For this exercise, each student will need 12 of these template sheets. Plain copy paper will work, but cardstock will make the dodecahedron sturdier and longer lasting. Additionally, students will need crayons and or markers, scissors, and tape or a stapler.
Beginning the Dodecahedron Project
Since I started this strategy decades ago, state standards have slightly changed and indicators are more detailed, so now, instead of assigning the 12 topics, I allow my students to choose 12 topics from an extensive list we develop as a class. When I taught high school, after I introduced a unit such as World War II, I would have students brainstorm related topics, ideas, and events. With my guidance, they might list topics such as the bombing of Pearl Harbor, the Axis and Allied powers, totalitarianism, isolationism, Japanese internment, battles, the Holocaust, victory gardens, etc., and I would write them on the board.
At the end of the brainstorming session, we might have up to 20 topics, ideas, or events listed. We would discuss them, and I would add any topics of importance in the state standards that we hadn’t listed. Each student was then allowed to pick 12 topics they wanted to learn more about.
Depending on the amount of time you have for a unit, students can do the work in class or at home. My history units generally took one to two weeks, and for the most part my students would work on this project in class. Once they had their topics, I would give them each 12 template sheets, one for each topic.
With template sheets in hand, students would start researching their topics. To prepare for the research, I would ask the media specialist to pull World War II content books, materials, and encyclopedias and put them on a cart for a rolling library; you can also have students do research online, to help them learn how to vet materials.
To help students stay on track during independent research, I had them complete one information sheet for each topic. I didn’t give a grade for completing this page, but I could walk around the room and quickly see what students were finding and learning. During this research time, students could sit on the floor, use a standing desk, or work at the classroom tables. Small freedoms like this, combined with the chance to make choices about their topics of study, helped make this experience enjoyable.

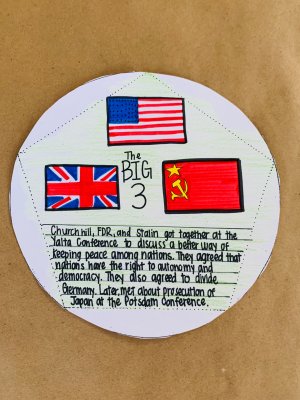
Once students had finished researching a topic and filling in the research information, they would get a template sheet and write a summary and illustrate the topic with a drawing. Because the writing space was limited, they weren’t overwhelmed as they sometimes were when writing a long paper. Their summaries had to be concise but still include details and examples to demonstrate their comprehension of the topic. I emphasized writing with purpose and clarity.
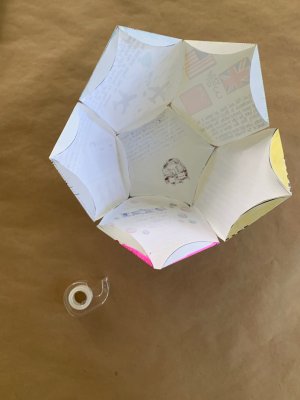
After my students had completed all 12 sheets, it was time to assemble their dodecahedrons. First they cut out the circle of each template and then folded along the dotted lines and used tape or a stapler to attach each side. When each dodecahedron was assembled, it looked a bit like a soccer ball.
Presenting the Dodecahedrons
Next, I had students present their dodecahedrons to the class. I gave each student four minutes to explain and show four or five sides of their dodecahedron. After each presentation, the class had two minutes to ask questions for clarity. My grading was based on quality of summaries, artistic expression of topic through illustration, efficient use of research time, and clear communication during the presentation.
Following the presentations, I hung the dodecahedrons from the classroom ceiling for all to enjoy for a few weeks. After that, students took them home—and most of them told me that they hung them in their bedrooms.
If your students needed extra motivation or if you have classes that are highly competitive, you could make the project into a competition by asking faculty members to judge the dodecahedrons and presentations, and award a first, second, and third place for each class.
