Tips for Using Graphic Organizers in Elementary Math
An education specialist shares her step-by-step guide, which has helped her students better utilize visual supports.
Your content has been saved!
Go to My Saved Content.
When I started as a bilingual education specialist, I created a binder for each of my fifth-grade students that contained all of the math graphic organizers they would need for the whole school year. I was so excited to pass out the binders—I thought I had given my students a fundamental tool that they’d use over and over again.
But as the school year got going, a glaring problem emerged. When I asked my students for feedback about the binder full of graphic organizers, I got some disappointing and honest answers:
- “I use the binder to keep all my other papers.”
- “Oh, it’s at home.”
- “I think it’s in my backpack. I don’t need it in class.”
- “I lost it.”
I realized that it’s not helpful to simply hand out the organizers and expect students to immediately, independently, know how to use them. Toward the end of my first year of teaching, I focused on a number of fixes, including ways to create more compelling and effective graphic organizers, where “learning goals drive the design.” I enjoy making graphic organizers with my students, but that’s not always practical, so I studied up on tips to incorporate “pre-created” organizers (either made by me or adapted from an online resource).
And I came to understand the importance of introducing each graphic organizer individually, instead of delivering them all at once. Teaching a concept—and then explaining how to connect it to the visual support provided by a graphic organizer—enhances students’ learning. It encourages students to take initiative and independently try to solve their math problems.
I brought my revised strategies back to the classroom and have been excited about the results. Nowadays, I’ve seen a meaningful increase in students remembering to bring their materials, as well as an improvement in independently using graphic organizers.
Below are some practical tips for finding and tweaking graphic organizers, as well as teaching students how to use graphic organizers in a variety of settings—particularly during specialized academic instructions.
Finding the Right Graphic Organizer
Start by reviewing your grade-level mathematics pacing guide (also called “scope and sequence”). This document typically delineates which topic should be taught each week to ensure that all grade-level classes are simultaneously learning the same content. It guides lesson plans for specialized academic instruction time, ensuring alignment with the general education curriculum.
Next, search for a graphic organizer that targets the math skill you’re teaching. I first look at the resource pages (often referred to as “teacher tool boxes”) provided via digital or printed teachers’ manuals. I also search other teacher-created websites. My favorites include Math Tech Connections, Algebra Made Simple, Cognitive Cardio Math, and Play Based Fun. These sites have high-quality graphic organizers that often feature key elements, like the following:
- Consistent color coordination (I want to make sure the colors have a purpose, and their purpose is consistent throughout the entire document)
- A designated workspace (i.e., fill-in boxes) where students can write out numbers from their math problems
- Visual icons (like pictures of base ten blocks)
- A simple, minimalist layout where all the components mentioned above serve a functional purpose
If I can only find organizers with one or none of the above elements, I will make my own organizer instead. And if I know a topic will involve skills that my students are scaffolding, I’ll create my own graphic organizer to embed those scaffolds.
After an organizer is selected, complete a trial calculation to see if the organizer is a good fit. This will allow you to familiarize yourself with the graphic organizer’s structure. Depending on your students’ needs, you might have to make some edits—for example, adding verbiage such as “first,” “then,” “next,” and “last” on different parts of the graphic organizer. This is to communicate to students the order in which they’ll use the components of the organizer.
If the graphic organizer has instructions, consider including a translated version so that students can access the directions in their first language. Sometimes, graphic organizers meet all requirements except consistent color coordination. In those cases, I recommend printing and using color highlighters to achieve a functional color element.
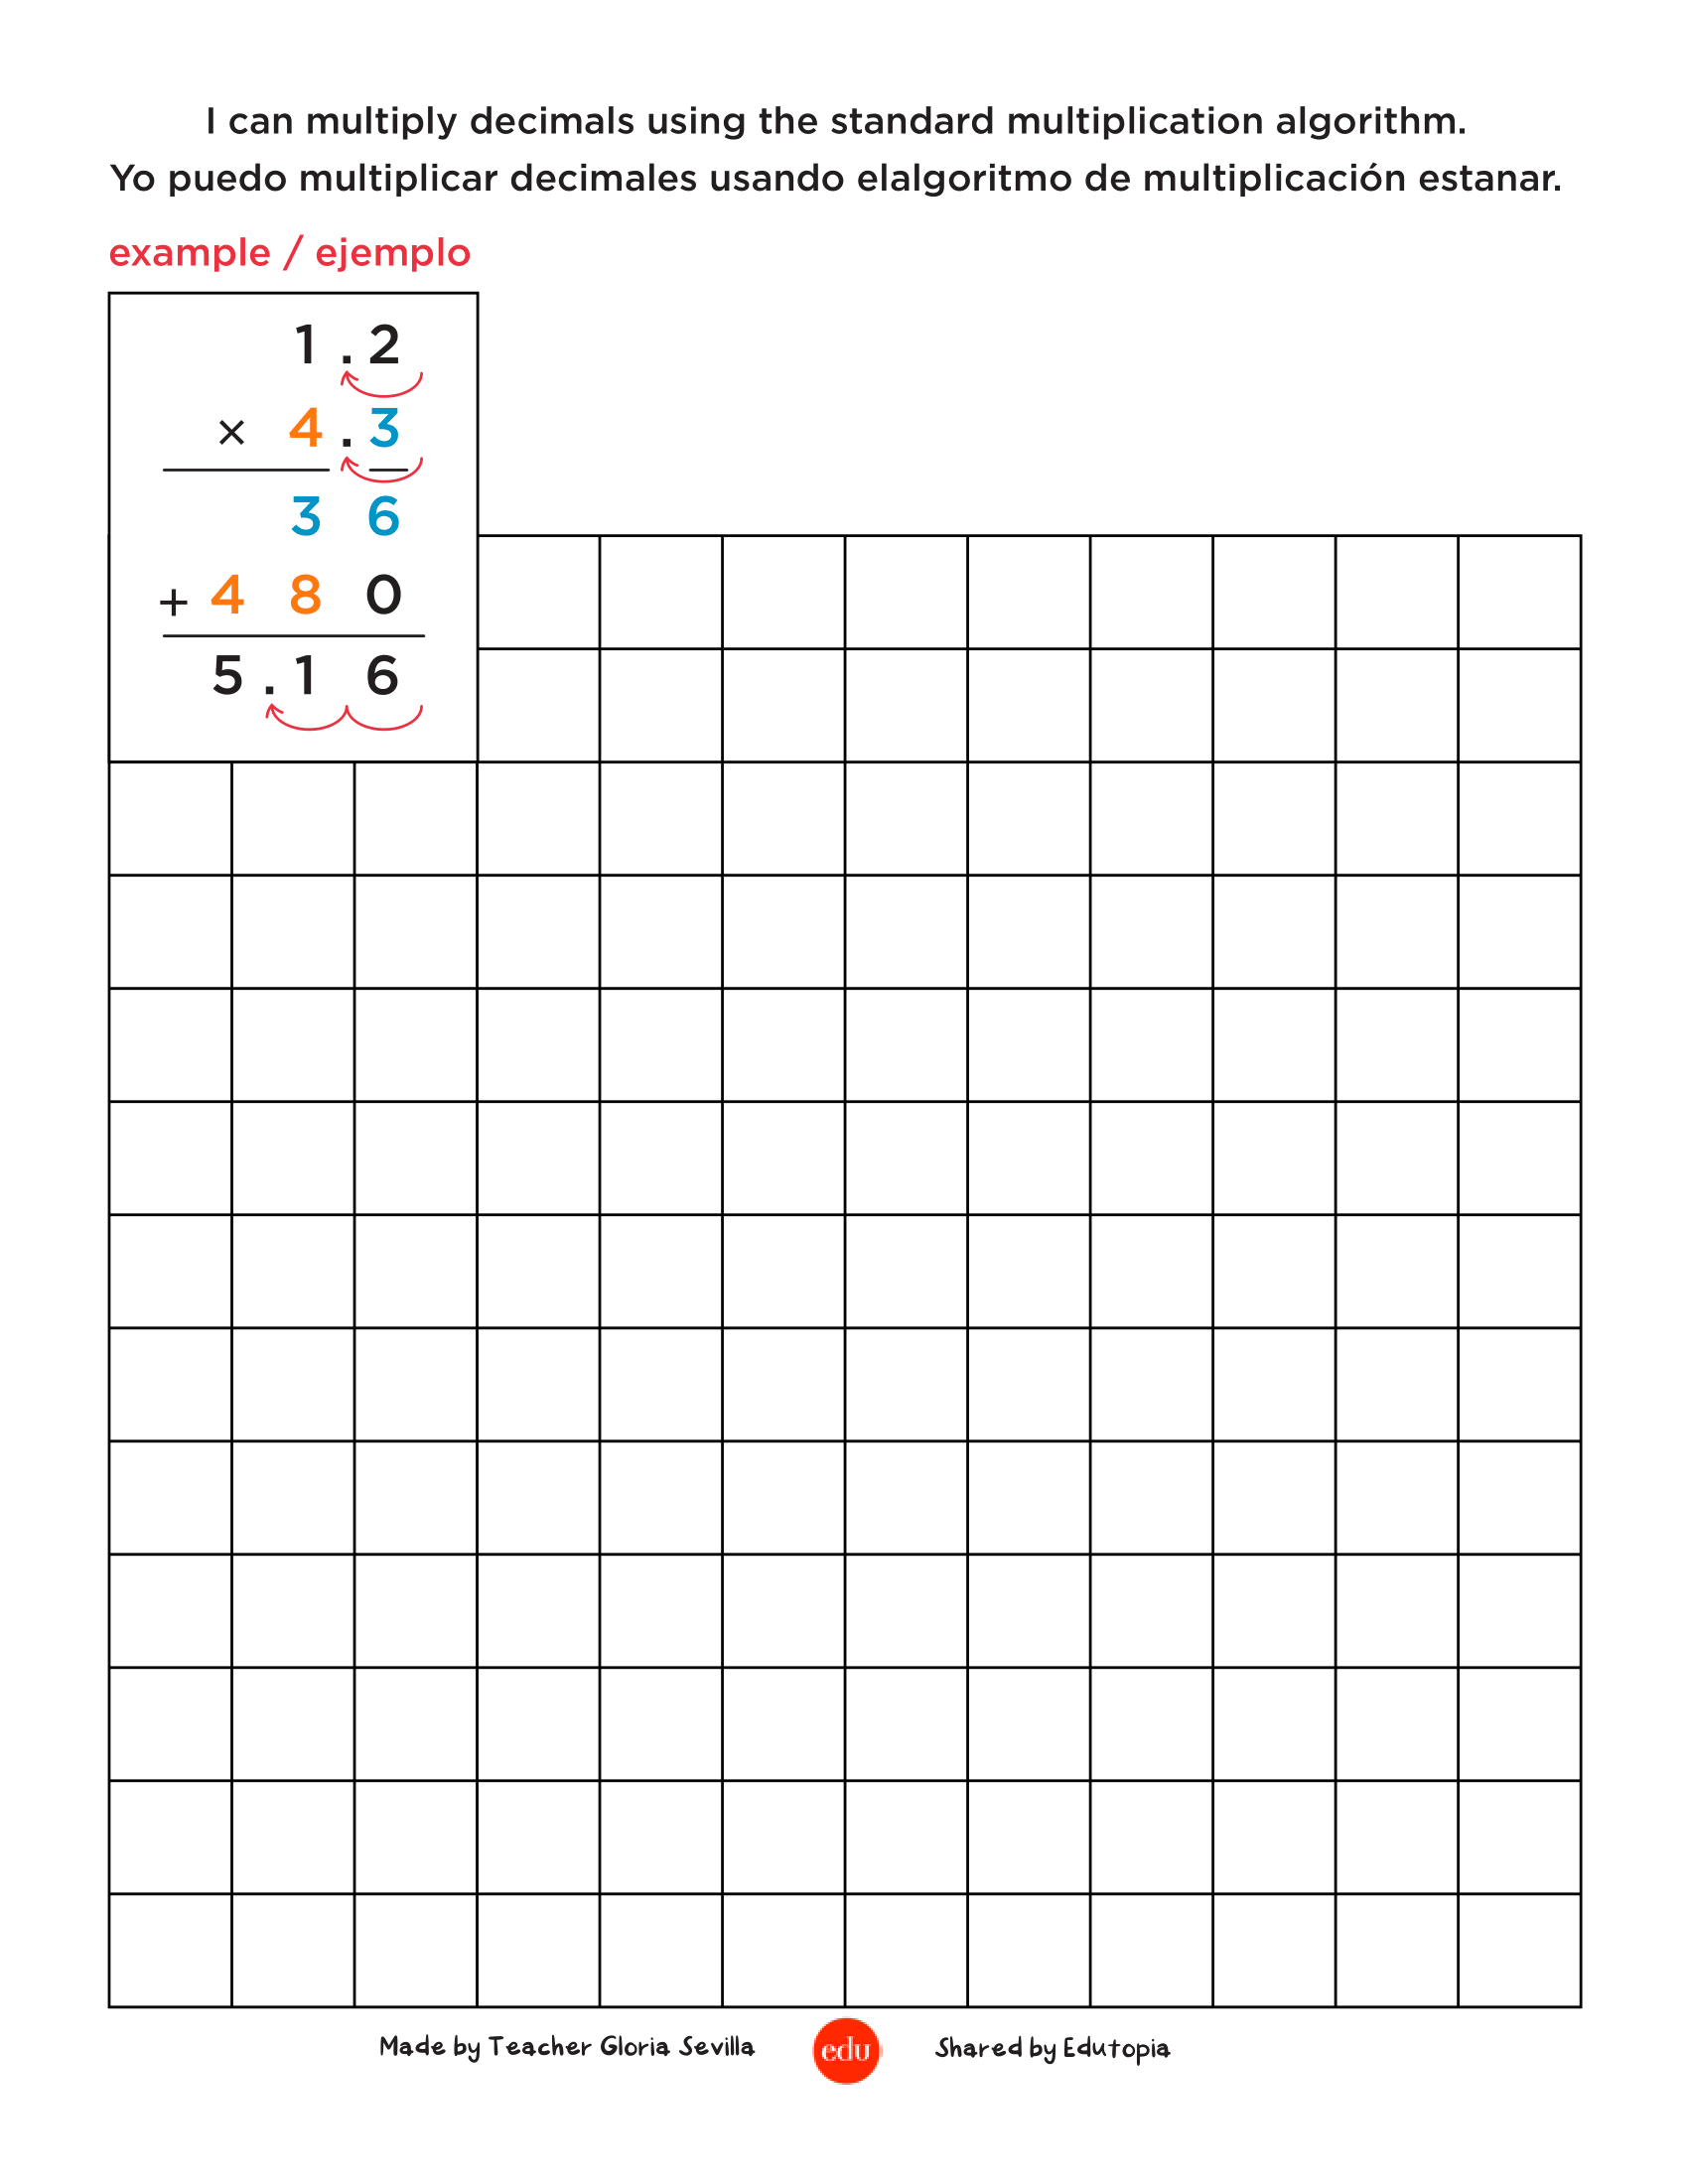
A sample graphic organizer of mine is below; you can download it (as well as an additional graphic organizer) by using the download link.
Introducing Graphic Organizers
After I’ve selected a graphic organizer, I move on to the following seven steps.
- Begin by teaching a mathematical concept via manipulatives (counters, base ten blocks, fraction tiles, etc.) and a review of key vocabulary. This ensures that students understand the actual concept instead of just memorizing how to fill in the boxes on the graphic organizer to derive a calculation.
- Use explicit, systematic instruction to practice conceptual understanding with the manipulatives. For example, I’ll model how to derive the solution and then have students complete at least two problems with me. During this step, I prompt the students with questions: What is next? How did we find that number? Why can’t I do this instead?
- Once they are ready, have students complete problems independently. Make sure they demonstrate individual mastery for two to three trials.
- Introduce the graphic organizer, but don’t pass it out to students just yet. Instead, I recommend holding the organizer and visually walking through it with students, prompting them with the question, “What do we see?” They’ll detail what they notice, and you can explain the different components of the graphic organizer, explicitly paying close attention to colors, shading, boxes, etc.
- Have students watch you go through a complete calculation/math problem example using the graphic organizer.
- Hand each student a graphic organizer, whiteboard marker, and eraser. Once again, use explicit, systematic instruction to practice the calculations using the graphic organizer. The procedure is the same as in step three.
- Assign students three to four calculations (depending on the topic’s complexity) to solve as a team. The key here is to prompt students to be each other’s teachers. I like to provide corrective feedback as needed during this time, but I often observe each student’s mathematical thought processes. I have found that even if students master different parts of the topic, when they’re given a pre-created graphic organizer and work collectively, they can gain a stronger understanding.
Additional Tips
Get the right (reusable) supplies: I recommend giving each student a one-inch binder to store the graphic organizers. It’s also helpful to put each graphic organizer in a plastic sheet protector and provide students with a whiteboard marker and eraser. This way, students can reuse the graphic organizer as needed.
Make a binder for you and your staff: To maintain consistency, consider giving each person who provides instruction (paraprofessionals, instructional assistants, and teachers) the same graphic organizers. This makes it easier for staff to identify and communicate with each other about specific areas within the calculation where students may need support. Lastly, staff may be relearning concepts too! These binders are a streamlined method to refresh staff’s knowledge and manage their learning progressions.
Make it fun: Allow students to personalize their binder—it’s their learning tool, so they should be encouraged to be proud of their work.
Help with goal-setting: Reiterate to students that we are practicing good habits for reasons that go beyond math lessons. Strong organizational skills will benefit them greatly when they move on to junior high, high school, and college.